Mastering Asepsis: The Cornerstone of Safe Nursing Care
Table of Contents
Introduction: Why Asepsis is Non-Negotiable in Nursing
Imagine this: a simple nursing action, like changing a wound dressing or inserting an IV line, stands at a critical crossroads. Performed with meticulous care, it paves the way for a patient’s swift recovery. Performed carelessly, it can introduce a cascade of microorganisms, leading to a debilitating, costly, and potentially life-threatening infection. This is the profound power and immense responsibility embodied in the principle of asepsis.
Asepsis is the fundamental, non-negotiable practice of preventing infection by eliminating or drastically reducing the presence of disease-causing microorganisms. It is far more than a checklist of rules to be memorized for an exam; it is a professional mindset, an “aseptic conscience,” that must be woven into the very fabric of every patient interaction. From the moment you enter a patient’s room to the moment you leave, every touch, every procedure, and every decision is guided by this core principle.
This guide is designed to transform your understanding of asepsis from abstract theory into concrete, actionable practice. We will begin by dissecting the two fundamental types of asepsis—medical and surgical. From there, we will build upon this foundation by exploring the three practical pillars of modern infection control: Standard Precautions, the universal baseline for all patient care; Hand Hygiene, your single most effective tool; and the correct use of Personal Protective Equipment (PPE). Through clear explanations, memory aids, and real-world nursing applications, you will gain the confidence and competence to make asepsis an instinctual part of your professional identity.
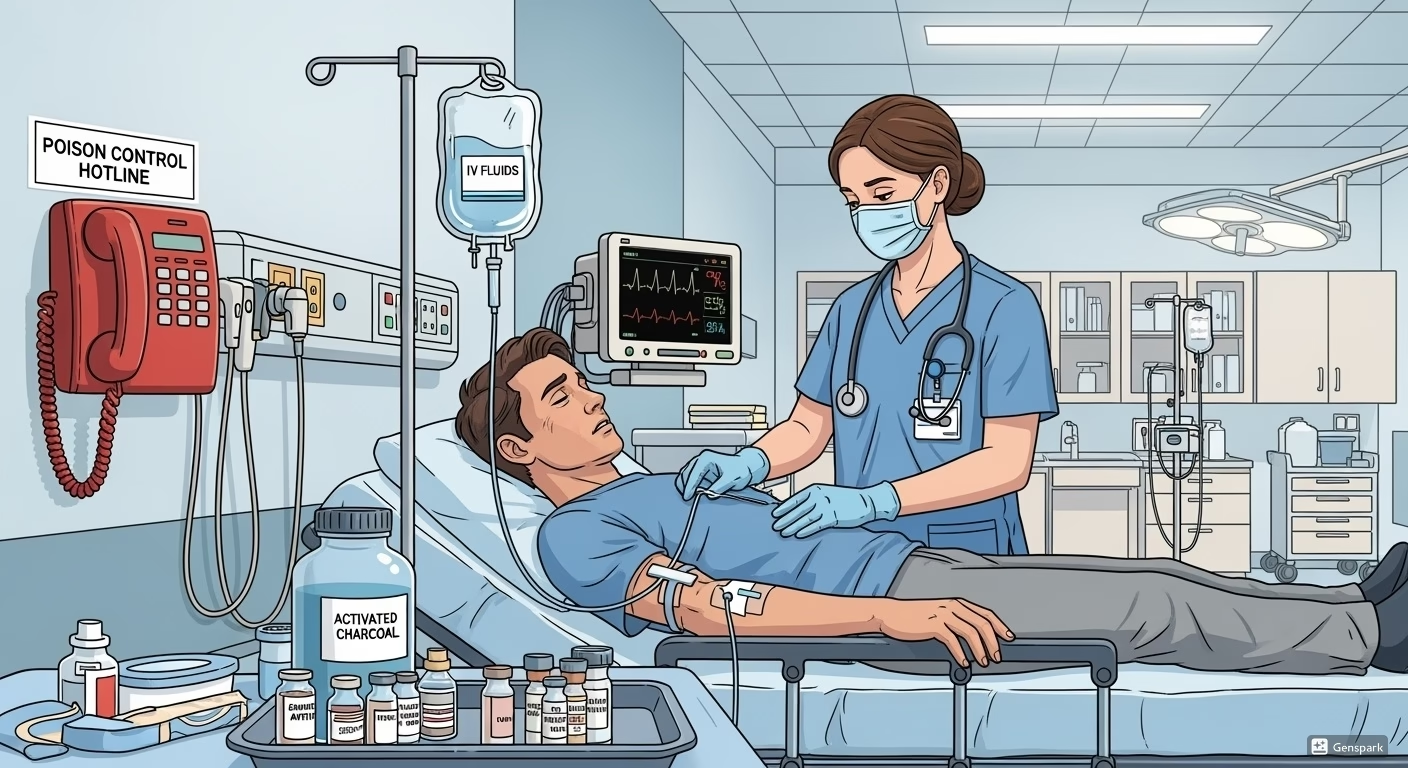
Asepsis in action: A combination of meticulous hand hygiene and appropriate barrier protection creates a shield of safety for every patient.
Part 1: The Two Worlds of Asepsis: Medical vs. Surgical
To master infection control, a nurse must first understand that “asepsis” is not a single concept but a spectrum with two distinct poles: medical asepsis and surgical asepsis. While both share the goal of preventing infection, their methods, applications, and levels of stringency are fundamentally different. Understanding this distinction is the first step toward applying the correct techniques in the right clinical situations.
Asepsis Defined: The Bedrock of Infection Prevention
At its core, asepsis is defined as the state of being free from disease-causing microorganisms, such as pathogenic bacteria, viruses, and fungi (Wikipedia). It is the foundational theory upon which all modern infection control practices are built. In a healthcare environment teeming with microscopic life, asepsis is the purposeful, systematic effort to break the chain of infection, protecting both the patient from acquiring a healthcare-associated infection (HAI) and the healthcare worker from occupational exposure.
Medical Asepsis (The “Clean Technique”)
Medical asepsis, often called the “clean technique,” involves practices that reduce the number of microorganisms and prevent their spread from one person or place to another. The goal is not to eliminate all microbes, but to confine them to a specific area, limit their growth, and prevent their transmission. It’s a strategy of containment and reduction.
Think of medical asepsis as maintaining a “clean zone.” You are actively working to keep the patient and their immediate environment as clean as possible to minimize the risk of infection. This is the standard of care for the vast majority of nursing interactions.
Nursing Implementation: When is Medical Asepsis Used?
Medical asepsis is your daily default. It applies to a wide range of routine nursing tasks, including:
- Administering oral or intramuscular medications.
- Changing bed linens.
- Assisting with patient hygiene, such as bathing or perineal care.
- Taking vital signs.
- Inserting a nasogastric tube.
- Providing routine wound care for a simple, non-sterile dressing change.
The core practices of medical asepsis, which we will explore in detail, include meticulous hand hygiene, cleaning the environment, and using appropriate personal protective equipment (PPE) like clean gloves (Nurse Plus Academy).
Surgical Asepsis (The “Sterile Technique”)
Surgical asepsis, or the “sterile technique,” is a far more stringent set of practices designed to eliminate all microorganisms and their spores from an object or area. The goal is to create and maintain a completely sterile, or microbe-free, environment. This is a strategy of total elimination and exclusion.
Think of surgical asepsis as creating a “no-fly zone” for all microbes. Any breach of this sterile field, no matter how small, is considered a contamination event that compromises patient safety. This technique is reserved for invasive procedures where there is a high risk of introducing pathogens directly into a sterile part of the body.
Nursing Implementation: When is Surgical Asepsis Used?
Surgical asepsis is required for high-risk, invasive procedures that bypass the body’s natural defenses. Key examples include:
- Performing procedures in an operating room.
- Inserting an indwelling urinary catheter.
- Inserting a peripheral or central intravenous (IV) line.
- Administering IV medications.
- Performing sterile dressing changes on complex or surgical wounds.
- Performing suctioning of the lower airway (trachea).
The practices of surgical asepsis involve a surgical hand scrub, the use of sterile gloves, gowns, and drapes, and the strict maintenance of a sterile field where only sterile items can touch other sterile items (OpenTextBC Clinical Skills).
At-a-Glance: Medical vs. Surgical Asepsis
This table provides a clear comparison of the two fundamental approaches to asepsis. Understanding these differences is crucial for applying the correct level of precaution in your nursing practice.
| Characteristic | Medical Asepsis (“Clean Technique”) | Surgical Asepsis (“Sterile Technique”) |
|---|---|---|
| Primary Goal | To reduce the number and prevent the spread of pathogens. | To eliminate all microorganisms (pathogenic and non-pathogenic) and their spores. |
| AKA | Clean Technique | Sterile Technique |
| Hand Hygiene | Standard handwashing or alcohol-based hand rub. | Extensive surgical hand scrub with antimicrobial soap, including forearms. |
| Personal Protective Equipment (PPE) | Clean gloves, gown, mask as needed. | Sterile gloves, sterile gown, mask, and hair/shoe covers are often required. |
| Environment | Work area is clean; equipment is disinfected. A “clean field” is established. | A “sterile field” is created using sterile drapes; only sterile items are allowed within it. |
| Key Principle | Confine pathogens and prevent transmission. “Clean touches clean.” | Exclude all microbes. “Sterile touches only sterile.” |
| Common Use Cases | Taking vital signs, administering oral meds, patient hygiene. | Catheter insertion, IV insertion, surgical procedures, sterile dressing changes. |
Part 2: Standard Precautions: The Universal Rule of Patient Care
If medical and surgical asepsis are the two major strategies in the fight against infection, then Standard Precautions are the foundational rules of engagement. Established by the Centers for Disease Control and Prevention (CDC), Standard Precautions are the minimum infection prevention practices that apply to all patient care, in all healthcare settings, regardless of the patient’s suspected or confirmed infection status. They are the first and most critical tier of protection for both patients and healthcare workers.
The Guiding Philosophy: A Universal Approach to Safety
The core philosophy of Standard Precautions is simple yet profound: treat all human blood, body fluids (except sweat), non-intact skin, and mucous membranes as if they are infectious (CDC). This approach eliminates the need to guess which patients are infectious and ensures a consistent, high level of safety for every interaction. It is a proactive, risk-based system, not a reactive one. The decision to use specific protections, like gloves or a mask, is based on the nature of the interaction you anticipate, not on the patient’s diagnosis.
Core Components of Standard Precautions
Standard Precautions are not a single action but a bundle of practices that work together to break the chain of infection. As a nurse, you are responsible for implementing every one of these components.
1. Hand Hygiene
This is the undisputed cornerstone of infection prevention. It involves cleaning your hands at critical moments to remove pathogens and prevent their transmission. While we will cover the detailed “how-to” in the next section, the principle within Standard Precautions is that hand hygiene must be performed before and after any patient contact, after contact with potentially infectious material, and after removing gloves.
2. Personal Protective Equipment (PPE)
The use of PPE is dictated by a risk assessment of the task you are about to perform. The key question is: “What is the anticipated exposure?”
- Gloves: Use when you anticipate touching blood, body fluids, mucous membranes, non-intact skin, or contaminated items.
- Gowns: Use during procedures and patient care activities when contact of your clothing/exposed skin with blood or body fluids is anticipated.
- Mask and Eye Protection (Goggles/Face Shield): Use during activities that are likely to generate splashes or sprays of blood or body fluids.
3. Respiratory Hygiene / Cough Etiquette
This component is designed to control the spread of respiratory pathogens at the source. It applies to anyone in a healthcare setting (patients, staff, visitors) with signs of respiratory illness.
- Cover the Source: Cover the mouth and nose with a tissue when coughing or sneezing.
- Dispose and Clean: Dispose of the used tissue in the nearest waste container and perform hand hygiene immediately.
- Masking: Offer a mask to a coughing patient when they are in a common area.
- Separation: Encourage spatial separation (ideally >3 feet) from others in common waiting areas.
Nursing Implementation: Your role is to facilitate this by ensuring tissues, no-touch waste receptacles, and alcohol-based hand rub are accessible. You also educate patients and visitors and post visual aids as reminders.
4. Sharps Safety
Injuries from contaminated needles and other sharps are a primary route for transmitting bloodborne pathogens like Hepatitis B, Hepatitis C, and HIV. Strict adherence to sharps safety is non-negotiable.
- Never Recap: Do not recap used needles by hand.
- Use Safety Devices: Employ safety-engineered devices (e.g., needles with safety shields, needleless systems) whenever possible.
- Dispose Promptly: Immediately place used sharps in a designated, puncture-resistant, leak-proof, and properly labeled sharps disposal container.
5. Safe Injection Practices
This set of practices prevents the transmission of infectious diseases between patients or between a patient and a healthcare provider during injections.
- The Golden Rule: One Needle, One Syringe, Only One Time.
- Vial Use: Use single-dose vials for a single patient whenever possible. If multi-dose vials must be used, dedicate them to a single patient. Always access them with a new, sterile needle and syringe.
6. Sterile Instruments and Devices
Nurses are responsible for ensuring that equipment used for invasive procedures is sterile. This involves understanding the principles of sterilization and disinfection. Reusable equipment must be thoroughly cleaned and then appropriately reprocessed (e.g., sterilized or high-level disinfected) between each patient use according to manufacturer instructions and facility policy.
7. Clean and Disinfected Environmental Surfaces
The patient’s environment can be a reservoir for pathogens. Nurses play a key role in ensuring that high-touch surfaces are regularly cleaned and disinfected. This includes bed rails, overbed tables, call bells, doorknobs, and any equipment brought into the patient’s room.
Beyond the Basics: Introducing Transmission-Based Precautions
While Standard Precautions are the universal foundation, some infections require an extra layer of defense. Transmission-Based Precautions are the second tier of infection control, used in addition to Standard Precautions for patients with known or suspected infections that are spread in one of three ways: by contact, droplet, or through the air.
The three categories of Transmission-Based Precautions are:
- Contact Precautions: Used for infections spread by direct or indirect contact (e.g., MRSA, C. difficile). Primary PPE: Gown and Gloves.
- Droplet Precautions: Used for infections spread by large respiratory droplets (e.g., Influenza, Pertussis). Primary PPE: Surgical Mask.
- Airborne Precautions: Used for infections spread by small airborne particles that can remain suspended in the air (e.g., Tuberculosis, Measles, Varicella). Primary PPE: Fit-tested N95 Respirator and placement in an Airborne Infection Isolation Room (AIIR).
Part 3: Hand Hygiene: Your Most Powerful Tool
Of all the infection control measures, none is more simple, more effective, or more critical than hand hygiene. It is the single most important practice in preventing the transmission of healthcare-associated infections (HAIs). Mastering the “when” and “how” of hand hygiene is not just a skill; it is a professional obligation.
The “Why”: The Undisputed Champion of Infection Control
Hands are the primary vehicle for transmitting microorganisms from patient to patient, from the environment to the patient, and from the patient to the healthcare worker. A single moment of contact can transfer thousands of microbes. Consistent and correct hand hygiene breaks this chain of transmission decisively. The CDC emphasizes that this simple action reduces the spread of deadly germs, including those resistant to antibiotics (CDC Clean Hands).
The “When”: The 5 Moments for Hand Hygiene
The World Health Organization (WHO) has developed an evidence-based model that simplifies the “when” of hand hygiene into five critical moments. Committing these to memory ensures you are cleaning your hands at the points of highest risk.
The 5 Moments for Hand Hygiene
- Before Touching a Patient: To protect the patient from harmful germs on your hands. (Example: Before shaking a patient’s hand or helping them move up in bed).
- Before a Clean or Aseptic Procedure: To protect the patient from germs entering their body. (Example: Before inserting an IV, changing a sterile dressing, or preparing medication).
- After Body Fluid Exposure Risk: To protect yourself and the healthcare environment from the patient’s germs. (Example: Immediately after contact with blood, urine, or a wound, and after removing gloves).
- After Touching a Patient: To protect yourself and the healthcare environment from the patient’s germs. (Example: After taking vital signs or performing a physical assessment).
- After Touching Patient Surroundings: To protect yourself and the environment from germs on surfaces. (Example: After touching the bed rail, IV pump, or overbed table, even if you didn’t touch the patient).
The “How”: Technique is Everything
There are two primary methods for hand hygiene: using an alcohol-based hand rub (ABHR) and washing with soap and water. Knowing which to use and how to do it correctly is essential.
Alcohol-Based Hand Rub (ABHR): The Preferred Method
In most clinical situations, ABHR is the preferred method. It is more effective at killing most germs, is faster to use, and is generally less irritating to the skin than soap and water.
- When to Use: For all of the 5 Moments, as long as hands are not visibly soiled.
- Step-by-Step Guide:
1. Apply: Dispense the manufacturer-recommended amount of product into the palm of one hand.2. Palm to Palm: Rub hands palm to palm.3. Back of Hands: Rub the back of each hand with the palm of the other hand, with fingers interlaced.4. Fingers Interlaced: Rub palm to palm with fingers interlaced.5. Backs of Fingers: Rub the backs of fingers to opposing palms with fingers interlocked.6. Thumbs: Rub each thumb rotationally using the other hand.7. Fingertips: Rub the tips of your fingers in the opposite palm in a circular motion.8. Dry: Continue rubbing until the product is completely dry. This should take about 20 seconds. Do not wave hands to dry.
Handwashing with Soap and Water
While ABHR is preferred for its efficacy and convenience, traditional handwashing is essential in specific situations.
- When to Use:
- When hands are visibly dirty or soiled with blood or body fluids.
- After using the restroom.
- Before eating.
- When caring for patients with known or suspected infectious diarrhea, especially from spore-forming organisms like Clostridioides difficile (C. diff), as alcohol does not kill spores effectively.
- Step-by-Step Guide:
1. Wet: Wet hands with clean, running warm (not hot) water.2. Lather: Apply soap and lather well.3. Scrub: Vigorously scrub all surfaces of your hands for at least 15-20 seconds. A good timer is humming the “Happy Birthday” song twice. Use the same 7-step motion as with ABHR.4. Rinse: Rinse hands thoroughly under running water, keeping hands pointing down.5. Dry: Dry hands with a disposable paper towel.6. Faucet: Use the paper towel to turn off the faucet to avoid re-contaminating your hands.
A Note on Surgical Hand Antisepsis
This is a more rigorous, timed procedure required before sterile procedures. It involves using an antimicrobial soap to scrub hands and forearms for a prescribed length of time (typically 2-6 minutes), along with cleaning underneath the fingernails with a nail cleaner (CDC Surgical Hand Antisepsis). This falls under the umbrella of surgical asepsis.
Part 4: Personal Protective Equipment (PPE): Your Barrier Against Harm
Personal Protective Equipment (PPE) is specialized clothing or equipment worn by a healthcare worker for protection against infectious materials. It creates a physical barrier between you and potentially harmful microbes. However, PPE is only effective when it is selected correctly, used properly, and, most importantly, removed safely.
The Principle of Selection: Think Before You Protect
The choice of PPE is not based on a patient’s diagnosis alone but on a risk assessment of the task you are about to perform. Before any patient interaction, ask yourself:
- “What is the nature of the patient interaction?”
- “What is the likely mode of transmission (contact, droplet, airborne)?”
- “Will I be exposed to blood, body fluids, or respiratory secretions?”
- “Is there a risk of splashes or sprays?”
Your answers to these questions will determine the appropriate PPE combination for that specific task, in line with Standard and Transmission-Based Precautions.
The Nurse’s Toolkit: Understanding Your PPE
- Gloves (Non-sterile and Sterile): Non-sterile (“clean”) gloves are used for tasks under medical asepsis. Sterile gloves are required for procedures involving surgical asepsis to maintain a sterile field.
- Gowns: Isolation gowns protect your skin and clothing from being soiled. They should be fluid-resistant.
- Masks (Surgical vs. Respirators):
- Surgical Masks: These are fluid-resistant and protect you from large droplets and splashes. They also protect the patient from your own respiratory secretions. They do not provide a seal around the face.
- N95 Respirators: These are designed to filter out very small airborne particles. They must form a tight seal to the face to be effective and require a special “fit-test” for each healthcare worker. They are essential for Airborne Precautions (FDA).
- Eye Protection (Goggles and Face Shields): These protect the mucous membranes of your eyes from splashes or sprays. Personal eyeglasses are not adequate protection.
The Art of Donning (Putting On) PPE
Donning PPE in the correct sequence ensures that you are fully protected before entering a potentially contaminated area. The sequence generally proceeds from the “body up.”
The Science of Doffing (Taking Off) PPE
Doffing is the most critical step and carries the highest risk of self-contamination. The outside of your PPE is considered grossly contaminated. The sequence is designed to remove the most contaminated items first, in a way that prevents you from touching the contaminated exterior with your bare hands. The sequence is typically in alphabetical order.
Critical Thinking in PPE Use
Scenario: You are about to perform oral suctioning on a patient with a productive cough who is on Droplet Precautions.
Thought Process:
- Droplet Precautions require a surgical mask. That’s my baseline.
- Oral suctioning is an aerosol-generating procedure with a high risk of splashes. I need to protect my eyes and face. A face shield is better than goggles because it also protects my mask.
- I will be handling secretions. I definitely need gloves.
- The secretions could splash onto my clothes. I need a gown.
Conclusion: The correct PPE is a gown, gloves, a surgical mask, and a face shield.
Conclusion: From Knowledge to Habit
We have journeyed from the foundational definitions of medical and surgical asepsis to the practical, life-saving applications of Standard Precautions, Hand Hygiene, and Personal Protective Equipment. These principles are not merely academic concepts; they are the active, daily duties that define safe and compassionate nursing care.
The ultimate goal is to cultivate an “aseptic conscience”—an unwavering, internal commitment to upholding these principles in every situation, even when no one is watching. It is a fusion of knowledge, skill, and professional integrity. It is the quiet voice that reminds you to perform hand hygiene for the fifth time in ten minutes, to choose the correct PPE for a messy task, and to speak up if you witness a break in sterile technique.
As you move from the classroom to the clinical setting, practice these skills with diligence. Perform hand hygiene until it is an unconscious reflex. Don and doff PPE until the sequence is second nature. Challenge yourself with clinical scenarios. Mastering asepsis is not about passing an exam; it is about earning the trust of your patients and honoring the profound responsibility of your profession. It is, without exaggeration, about protecting lives.