
Respiratory Emergencies & Basic CPR
Comprehensive Nursing Notes
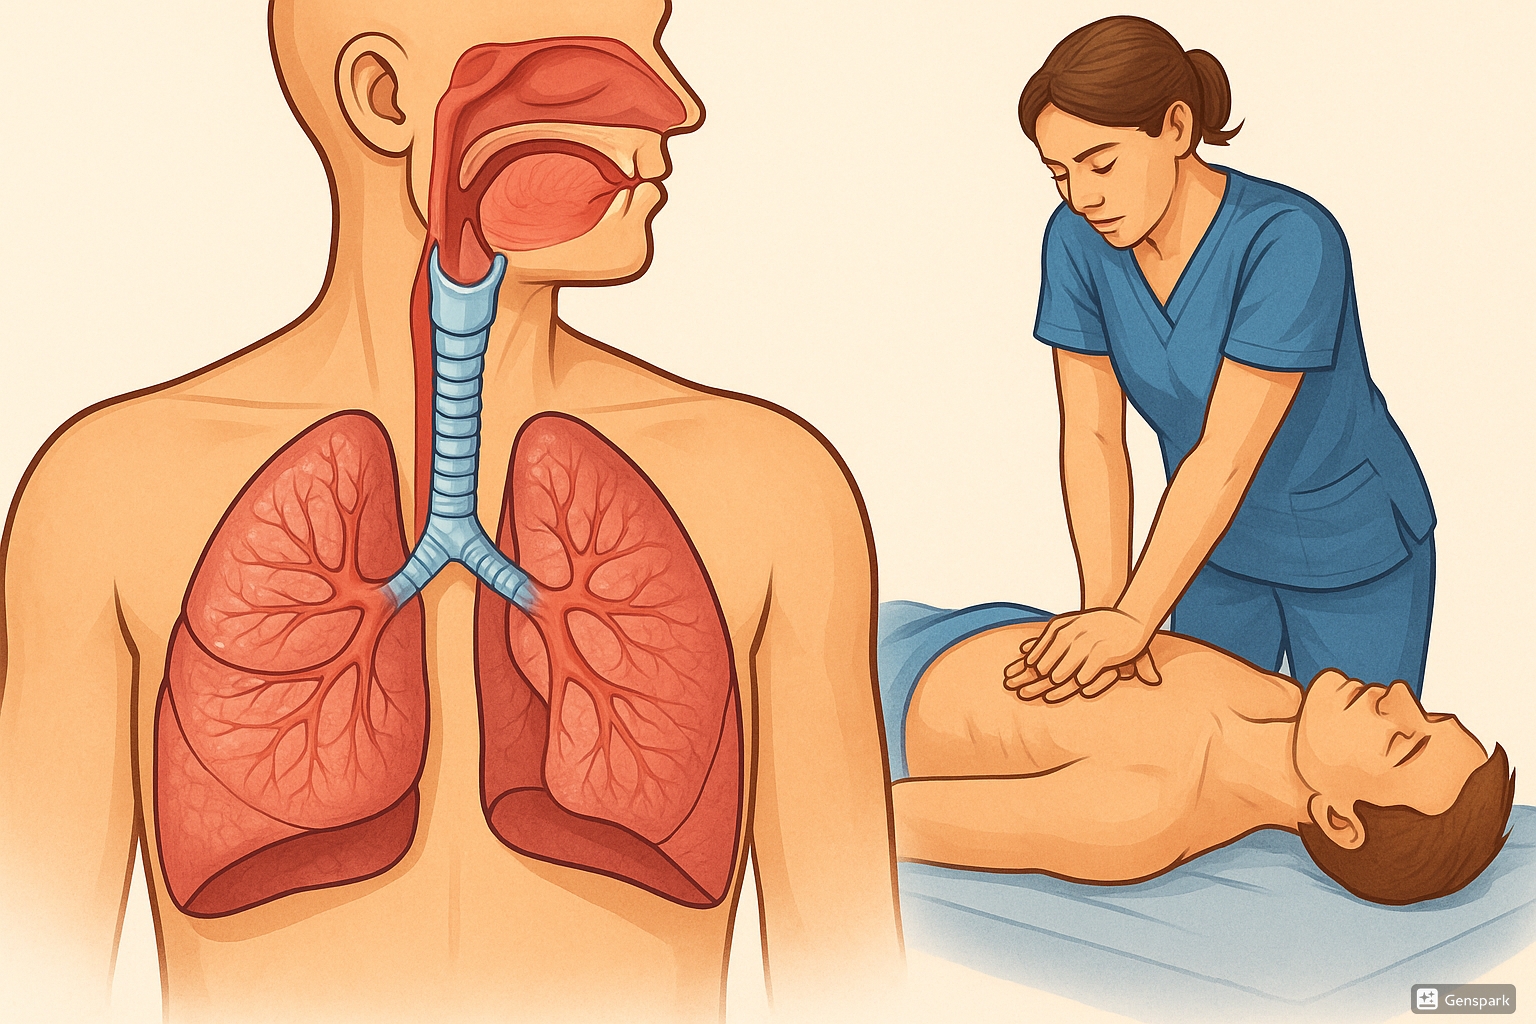
Professional medical illustration showing respiratory anatomy and emergency care
Table of Contents
1. Introduction to Respiratory Emergencies
Respiratory emergencies represent some of the most critical situations nurses encounter in clinical practice. These life-threatening conditions require immediate recognition, rapid assessment, and prompt intervention to prevent hypoxemia, tissue damage, and death. The respiratory system’s primary function is gas exchange, delivering oxygen to tissues and removing carbon dioxide waste. When this process fails, cellular metabolism shifts to anaerobic pathways, leading to acidosis and organ failure within minutes.
Key Concept
The brain can survive only 4-6 minutes without oxygen before irreversible damage occurs. This narrow window emphasizes the critical importance of rapid recognition and intervention in respiratory emergencies.
2. Respiratory System Anatomy & Physiology Review
Upper Respiratory Tract
The upper respiratory tract includes the nose, mouth, pharynx, and larynx. These structures warm, humidify, and filter incoming air while providing the pathway for gas exchange. The epiglottis serves as a critical protective mechanism, preventing aspiration during swallowing.
Lower Respiratory Tract
The lower respiratory tract consists of the trachea, bronchi, bronchioles, and alveoli. The trachea divides into primary bronchi at the carina, approximately at the level of the fifth thoracic vertebra. Progressive branching creates the bronchial tree, terminating in approximately 300 million alveoli where gas exchange occurs.
Mnemonic: RESPIRATORY
3. Common Respiratory Emergencies
Asthma Exacerbation
Pathophysiology: Bronchospasm, inflammation, and mucus production cause airway narrowing and increased work of breathing.
Signs: Wheezing, dyspnea, chest tightness, cough, accessory muscle use
Peak Flow: <50% predicted indicates severe exacerbation
Pneumothorax
Types: Spontaneous, traumatic, tension pneumothorax
Signs: Sudden chest pain, dyspnea, decreased breath sounds, hyperresonance
Tension PTX: Medical emergency with tracheal deviation, hemodynamic compromise
Pulmonary Edema
Cardiogenic: Left heart failure leading to increased pulmonary capillary pressure
Signs: Pink frothy sputum, crackles, orthopnea, JVD
Non-cardiogenic: ARDS, sepsis, aspiration
Pulmonary Embolism
Risk Factors: Immobility, surgery, malignancy, hormonal therapy
Classic Triad: Dyspnea, chest pain, hemoptysis (present in <20% of cases)
Wells Score: Clinical prediction tool for PE probability
Airway Obstruction
Partial: Stridor, voice changes, drooling
Complete: Unable to speak, universal choking sign, cyanosis
Causes: Foreign body, anaphylaxis, angioedema, trauma
Respiratory Failure
Type I: Hypoxemic (PaO2 <60 mmHg) - V/Q mismatch, shunt
Type II: Hypercapnic (PaCO2 >50 mmHg) – Hypoventilation
Combined: Both hypoxemia and hypercapnia
4. Comprehensive Respiratory Assessment
Primary Assessment (ABCDE Approach)
Airway
Assess patency, look for obstruction, position for optimal airway
Breathing
Rate, rhythm, depth, effort, symmetry, oxygen saturation
Circulation
Heart rate, blood pressure, perfusion, capillary refill
Disability
Neurological status, level of consciousness, Glasgow Coma Scale
Exposure
Full body examination, maintain temperature, preserve dignity
Respiratory-Specific Assessment
Mnemonic: BREATHING
Physical Assessment Techniques
Inspection
- Respiratory rate (normal: 12-20/min)
- Chest symmetry and expansion
- Use of accessory muscles
- Skin color and perfusion
- Positioning (tripod, orthopnea)
- Nasal flaring, pursed-lip breathing
Auscultation
- Breath sounds: vesicular, bronchial, bronchiovesicular
- Adventitious sounds: crackles, wheezes, rhonchi, stridor
- Diminished or absent breath sounds
- Voice sounds: bronchophony, egophony, whispered pectoriloquy
Critical Assessment Findings
- Stridor: Upper airway obstruction – immediate intervention required
- Silent chest: Severe bronchospasm or pneumothorax
- Paradoxical breathing: Flail chest or respiratory muscle fatigue
- Cyanosis: Late sign of hypoxemia (SpO2 <85%)
- Altered mental status: Hypoxemia or hypercapnia
5. Emergency Respiratory Interventions
Oxygen Therapy
Oxygen administration is the cornerstone of respiratory emergency management. The goal is to maintain adequate tissue oxygenation while avoiding oxygen toxicity. Target oxygen saturation varies by patient population and underlying conditions.
Nasal Cannula
Flow Rate: 1-6 L/min
FiO2: 24-44%
Indications: Stable patients, mild hypoxemia
Simple Face Mask
Flow Rate: 5-10 L/min
FiO2: 35-50%
Note: Minimum 5 L/min to prevent CO2 rebreathing
Non-Rebreather Mask
Flow Rate: 10-15 L/min
FiO2: 80-95%
Indications: Severe hypoxemia, emergency situations
Bag-Mask Ventilation
Indications: Apnea, severe respiratory distress
Technique: Two-person technique preferred
Rate: 10-12 breaths/min for adults
Pharmacological Interventions
Bronchodilators
- Albuterol: 2.5-5 mg via nebulizer or 90 mcg MDI
- Ipratropium: 0.5 mg via nebulizer, often combined with albuterol
- Mechanism: Beta-2 agonist causes bronchial smooth muscle relaxation
Anti-inflammatories
- Methylprednisolone: 125 mg IV for severe asthma
- Prednisolone: 1-2 mg/kg PO for pediatric patients
- Onset: 4-6 hours for systemic effects
6. Basic CPR Principles
Cardiopulmonary resuscitation (CPR) is a life-saving technique that combines chest compressions and rescue breathing to maintain circulation and oxygenation during cardiac arrest. High-quality CPR is essential for neurologically intact survival and requires proper technique, adequate depth and rate, complete chest recoil, and minimal interruptions.
Chain of Survival
The Chain of Survival represents the critical actions that increase the likelihood of survival from cardiac arrest: early recognition and activation of emergency response, early CPR, early defibrillation, advanced life support, and post-cardiac arrest care.
CPR Physiology
During cardiac arrest, chest compressions create artificial circulation by increasing intrathoracic pressure and directly compressing the heart. This generates forward blood flow, delivering oxygen and nutrients to vital organs, particularly the brain and coronary arteries. The mechanism involves both cardiac pump theory (direct heart compression) and thoracic pump theory (pressure changes in the thoracic cavity).
Mnemonic: CPR QUALITY
7. CPR Step-by-Step Protocol
Adult CPR Sequence
Assess Responsiveness
Tap shoulders, shout “Are you okay?” Check for normal breathing (no more than 10 seconds)
Activate Emergency Response
Call 911 or activate code team. Request AED if available
Check Pulse
Healthcare providers: Check carotid pulse for no more than 10 seconds
Position Patient
Supine on firm surface, head neutral, arms at sides
Hand Placement
Heel of one hand on lower half of breastbone, second hand interlocked on top
Chest Compressions
30 compressions at 100-120/min, at least 2 inches deep, complete recoil
Rescue Breaths
2 breaths, 1 second each, visible chest rise
Continue Cycles
30:2 ratio until ALS arrives or patient responds
High-Quality CPR Characteristics
Compression Technique
- Depth: At least 2 inches (5 cm), no more than 2.4 inches (6 cm)
- Rate: 100-120 compressions per minute
- Recoil: Allow complete chest recoil between compressions
- Position: Shoulders directly over hands, arms straight
- Interruptions: Minimize to less than 10 seconds
Rescue Breathing
- Duration: 1 second per breath
- Volume: Sufficient to produce visible chest rise
- Seal: Complete seal over mouth and nose
- Gastric Distention: Avoid excessive ventilation pressure
- Oxygen: Use supplemental oxygen when available
Common CPR Errors
- Insufficient depth: Compressions less than 2 inches deep
- Excessive interruptions: Prolonged pauses for pulse checks or rhythm analysis
- Incomplete recoil: Leaning on chest between compressions
- Wrong hand position: Too high on sternum or over xiphoid process
- Hyperventilation: Excessive rate or volume of rescue breaths
8. Special CPR Situations
Pregnancy (>20 weeks gestation)
- Positioning: Manual uterine displacement to the left or left lateral tilt of 15-30 degrees
- Compressions: May need to be slightly higher on sternum due to elevated diaphragm
- Perimortem cesarean: Consider within 4 minutes of arrest if >24 weeks gestation
- Team approach: Maternal and neonatal resuscitation teams
Pediatric Considerations
Infant (<1 year)
Technique: Two-finger or two-thumb encircling technique
Depth: At least 1/3 chest depth (1.5 inches/4 cm)
Ratio: 30:2 (single rescuer) or 15:2 (two rescuer)
Child (1-8 years)
Technique: One or two hands depending on child size
Depth: At least 1/3 chest depth (2 inches/5 cm)
Ratio: 30:2 (single rescuer) or 15:2 (two rescuer)
Drowning Victims
Drowning victims require immediate attention to hypoxemia. Begin with rescue breathing if the victim has a pulse but is not breathing. Water aspiration may cause laryngospasm, bronchospasm, and pulmonary edema. Do not attempt to remove water from lungs – focus on oxygenation and ventilation.
9. Nursing Implementation in Clinical Practice
Pre-Emergency Preparation
Nurses play a crucial role in preventing respiratory emergencies through vigilant monitoring, patient education, and early intervention. This includes understanding risk factors, recognizing early warning signs, and maintaining competency in emergency procedures.
Continuous Monitoring
- Vital signs including SpO2
- Respiratory pattern and effort
- Level of consciousness
- Skin color and perfusion
- Pain assessment (can affect breathing)
Risk Factor Identification
- History of respiratory disease
- Recent surgery or immobility
- Medications affecting respiration
- Allergies and triggers
- Smoking history and exposure
Patient Education
- Proper inhaler technique
- Recognition of warning signs
- When to seek emergency care
- Smoking cessation resources
- Environmental trigger avoidance
Equipment Readiness
- Oxygen delivery systems
- Suction equipment
- Bag-mask ventilation
- Emergency medications
- Intubation supplies
During Emergency Response
Nursing Actions: EMERGENCY
Documentation and Communication
Accurate documentation during respiratory emergencies is essential for continuity of care and quality improvement. Use objective language, include exact times, and document all interventions and patient responses.
Essential Documentation Elements:
- Time of onset and recognition
- Presenting signs and symptoms
- Interventions performed and patient response
- Medications administered
- Vital signs and oxygen saturation trends
- Communication with healthcare team
- Patient and family education provided
Post-Emergency Care
After stabilizing a respiratory emergency, nurses focus on ongoing assessment, preventing complications, and supporting patient recovery. This includes monitoring for signs of improvement or deterioration, addressing underlying causes, and providing emotional support.
Ongoing Assessment
- Respiratory status every 15-30 minutes initially
- Neurological function assessment
- Cardiac monitoring for arrhythmias
- Arterial blood gas analysis
- Chest X-ray for complications
Complication Prevention
- Aspiration precautions
- DVT prophylaxis
- Skin integrity maintenance
- Nutritional support
- Psychological support
Quality Improvement and Learning
Nurses should participate in debriefing sessions after emergency events to identify areas for improvement and enhance future response. This includes reviewing protocols, discussing team performance, and updating skills through simulation training.
10. Summary & Key Takeaways
Respiratory emergencies and cardiac arrest situations require rapid assessment, immediate intervention, and coordinated team response. Nurses serve as the frontline healthcare providers, often being the first to recognize deteriorating respiratory status and initiate life-saving interventions.
Key Success Factors: SAVES LIVES
Critical Reminders
- Time is critical in respiratory emergencies – seconds count
- High-quality CPR saves lives – proper technique is essential
- Team communication and coordination improve outcomes
- Continuous assessment identifies changes requiring intervention
- Prevention through education and monitoring is the best strategy
- Regular training maintains competency and confidence
- Documentation supports quality improvement and patient safety
Remember: You Can Make the Difference
As a nurse, your vigilant assessment, prompt recognition, and skilled intervention can mean the difference between life and death for patients experiencing respiratory emergencies. Stay current with guidelines, practice your skills regularly, and always be prepared to act.