
Surgical Instruments, Sutures & Equipment
Comprehensive Nursing Study Notes
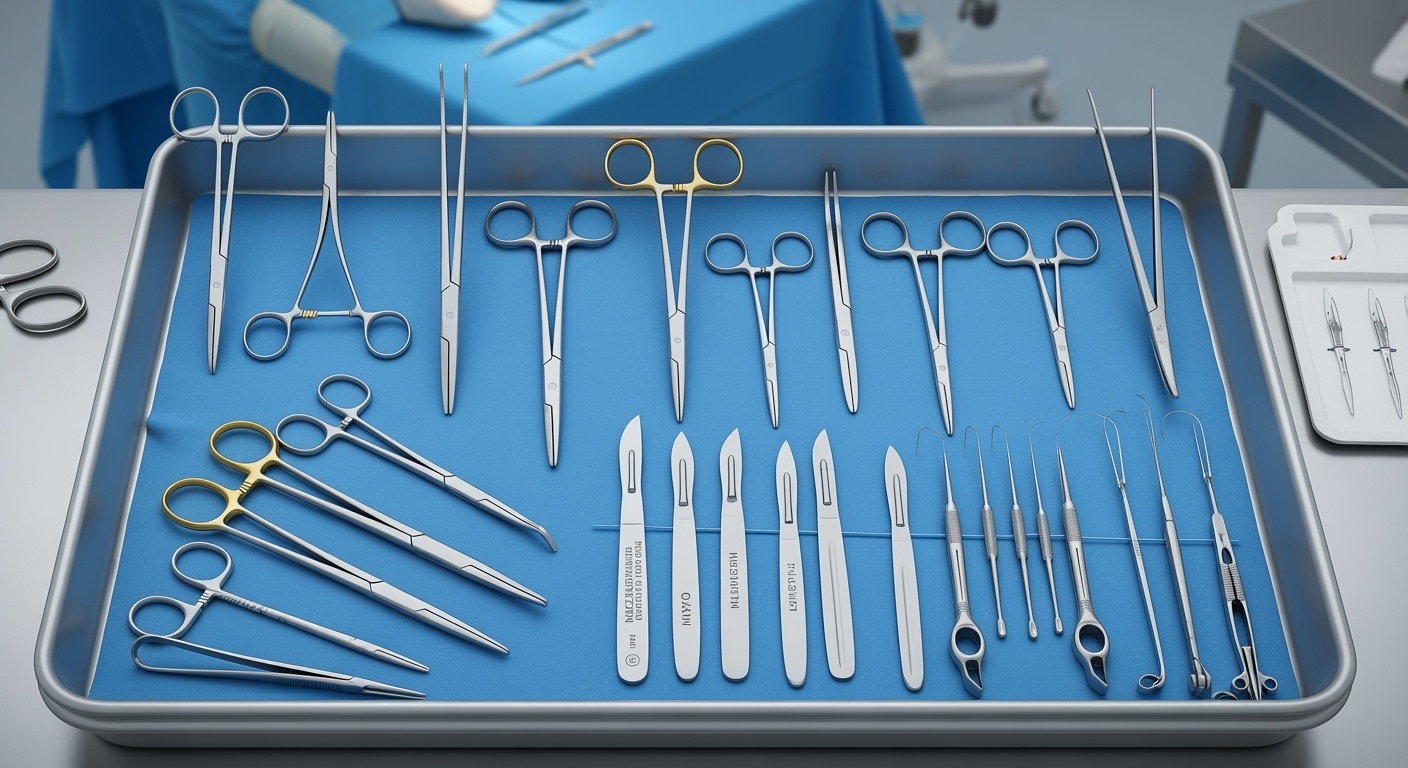
Professional surgical instrument setup demonstrating proper organization and sterile technique
Table of Contents
Introduction to Surgical Instrumentation
Surgical instrumentation forms the foundation of safe, effective surgical practice. As a nursing professional, understanding the proper identification, handling, and care of surgical instruments is crucial for patient safety, procedure efficiency, and optimal surgical outcomes.
Key Learning Objectives
- Identify and classify surgical instruments by function and design
- Understand suture materials, their properties, and appropriate applications
- Master proper handling and passing techniques for surgical instruments
- Apply knowledge of sterilization and maintenance procedures
- Implement safety protocols for surgical instrumentation
Historical Context & Modern Evolution
Surgical instruments have evolved from crude tools to precision-engineered devices. Modern instruments are designed with specific materials, ergonomics, and functionality to enhance surgical precision while minimizing tissue trauma. Understanding this evolution helps nurses appreciate the importance of proper instrument care and handling.
Memory Aid: The SHARP Principle
- Sterile – Maintain sterility at all times
- Handle – Proper handling techniques prevent damage
- Accurate – Precise identification prevents errors
- Respect – Treat instruments as precision tools
- Prepared – Always be prepared for instrument needs
Instrument Classification Systems
Surgical instruments are systematically classified based on their primary function, design characteristics, and intended use. This classification system enables efficient organization, quick identification, and appropriate selection during surgical procedures.
Cutting Instruments
- • Scalpels and surgical blades
- • Surgical scissors (various types)
- • Bone cutters and rongeurs
- • Electrocautery devices
Grasping Instruments
- • Forceps (tissue and dressing)
- • Hemostatic clamps
- • Needle holders
- • Towel clips and retractors
Retracting Instruments
- • Hand-held retractors
- • Self-retaining retractors
- • Deep tissue retractors
- • Specialized organ retractors
Probing & Dilating
- • Surgical probes
- • Dilators and sounds
- • Catheters and tubes
- • Measuring instruments
Classification by Material
Most common, durable, autoclavable
Lightweight, non-magnetic, biocompatible
Single-use, cost-effective, infection control
Basic Surgical Instruments
Every surgical procedure requires a fundamental set of instruments. These basic instruments form the core of any surgical tray and must be familiar to all perioperative nurses.
Scalpel and Surgical Blades
Handle Sizes:
- #3: Small, delicate procedures
- #4: Standard general surgery
- #7: Large surgical procedures
Common Blade Types:
- #10: Large curved blade – skin incisions
- #11: Pointed blade – precise cuts, stab incisions
- #15: Small curved blade – delicate dissection
Nursing Implementation: Scalpel Safety
- • Always pass scalpel in kidney basin or use hands-free technique
- • Announce “sharp” when passing cutting instruments
- • Never leave scalpel on sterile field unattended
- • Dispose of blades immediately after use in sharps container
- • Use blade remover or hemostat to remove used blades
Surgical Scissors
Metzenbaum Scissors
Delicate tissue dissection, curved or straight
Mayo Scissors
Heavy tissue cutting, suture cutting
Iris Scissors
Fine, delicate work, ophthalmology
Forceps
Tissue Forceps:
- • Adson: Fine tissue handling
- • Russian: Broader tissue grasping
- • DeBakey: Vascular surgery, minimal trauma
Dressing Forceps:
- • Plain: Non-tissue use only
- • Toothed: Secure tissue grasping
- • Bayonet: Deep cavity access
Memory Aid: Forceps Selection
“TISSUE” – Remember forceps characteristics:
- Toothed forceps for secure tissue grasping
- Idelicate procedures need fine-tip forceps
- Smooth forceps for non-tissue handling
- Special procedures need specialized forceps
- Universal principle: match forceps to tissue type
- Every forceps has specific indications
Cutting & Dissecting Instruments
Cutting instruments are designed for precise tissue division and surgical dissection. Understanding their specific applications and proper handling is essential for surgical efficiency and patient safety.
Specialized Cutting Tools
Electrocautery
Uses electrical current for cutting and coagulation
- • Monopolar: Single electrode, grounding pad required
- • Bipolar: Two electrodes, precise control
Harmonic Scalpel
Ultrasonic energy for cutting and coagulation
Laser Instruments
Precise cutting with minimal thermal damage
Bone Cutting Instruments
Rongeurs
Bite-like action for bone removal
Bone Cutters
Heavy-duty cutting of bone structures
Osteotomes
Chisel-like instruments for bone shaping
Bone Saws
Powered or manual saws for major bone cutting
Critical Safety Considerations
Electrocautery Safety:
- • Ensure proper grounding pad placement
- • Check for jewelry or metal implants
- • Keep oxygen levels <30% during use
- • Use lowest effective power setting
General Cutting Safety:
- • Always cut away from yourself and others
- • Maintain sharp instruments properly
- • Never use damaged cutting instruments
- • Follow manufacturer’s instructions
Grasping & Holding Instruments
Grasping instruments are essential for tissue manipulation, hemostasis, and maintaining surgical exposure. Proper selection and use prevent tissue damage while ensuring surgical precision.
Hemostatic Clamps
Kelly Clamps
Curved or straight, blunt tips
Use: Small vessel hemostasis
Mosquito Clamps
Fine, delicate hemostasis
Use: Tiny vessels, precise control
Rochester Clamps
Large, heavy-duty
Use: Large vessels, thick tissue
Clamp Application Technique:
- 1. Identify bleeding vessel precisely
- 2. Apply clamp perpendicular to vessel
- 3. Include minimal surrounding tissue
- 4. Check for adequate hemostasis
- 5. Avoid excessive tissue in clamp
- 6. Remove clamps systematically
- 7. Count all clamps before closure
- 8. Document any retained clamps
Needle Holders
Types of Needle Holders:
- • Mayo-Hegar: General purpose, good grip
- • Olsen-Hegar: Combined needle holder/scissors
- • Castroviejo: Microsurgery, fine work
- • Webster: Plastic surgery, delicate suturing
Selection Criteria:
- • Match holder size to needle size
- • Consider suture location and access
- • Choose appropriate jaw design
- • Consider surgeon preference
Retractors
Hand-held Retractors
- • Army-Navy: Small incisions
- • Richardson: Deep abdominal exposure
- • Deaver: Large, curved exposure
- • Ribbon: Malleable, custom shaping
Self-retaining Retractors
- • Weitlaner: Small, sharp teeth
- • Gelpi: Deep, sharp retraction
- • Bookwalter: Large abdominal procedures
- • Balfour: Abdominal wall retraction
Nursing Implementation: Instrument Handling
Passing Techniques:
- • Pass instruments in functional position
- • Announce instrument name when passing
- • Use firm, decisive hand placement
- • Anticipate surgeon’s needs
Care Considerations:
- • Check instrument function before use
- • Clean instruments between uses
- • Inspect for damage or wear
- • Maintain proper instrument counts
Sutures & Suture Materials
Sutures are the foundation of surgical closure, providing wound approximation, hemostasis, and tissue support during healing. Understanding suture characteristics, indications, and proper handling is crucial for optimal patient outcomes.
Suture Classification
By Absorption
Absorbable Sutures
Broken down by body enzymes or hydrolysis
- • Vicryl (Polyglactin 910): 2-3 weeks absorption
- • PDS (Polydioxanone): 6 months absorption
- • Monocryl: 1-2 weeks absorption
- • Chromic Gut: 1-2 weeks absorption
Non-absorbable Sutures
Permanent or require removal
- • Silk: Natural, excellent handling
- • Nylon: Strong, minimal tissue reaction
- • Prolene: Inert, cardiovascular use
- • Steel: Strongest, sternum closure
By Structure
Monofilament
Single strand, less tissue drag
- • Advantages: Less infection risk, smooth passage
- • Disadvantages: Memory, knot security
- • Examples: PDS, Monocryl, Nylon
Multifilament
Multiple strands, flexible handling
- • Advantages: Better handling, knot security
- • Disadvantages: Tissue drag, infection risk
- • Examples: Vicryl, Silk, Dacron
Suture Sizes and Selection
USP Suture Size Chart
Heavy Sutures
- 0, 1, 2, 3, 4, 5
- Fascia, tendons
- Orthopedic procedures
Medium Sutures
- 2-0, 3-0, 4-0
- General surgery
- Muscle, subcutaneous
Fine Sutures
- 5-0, 6-0
- Skin closure
- Vascular anastomosis
Very Fine
- 7-0, 8-0, 9-0, 10-0
- Microsurgery
- Ophthalmology, neurosurgery
Selection Criteria:
- • Tissue type: Match strength to tissue
- • Healing time: Consider absorption rate
- • Location: Cosmetic vs. functional areas
- • Patient factors: Age, allergies, infection risk
- • Procedure type: Emergency vs. elective
- • Surgeon preference: Handling characteristics
- • Cost considerations: Balance quality and economics
- • Special requirements: MRI compatibility, strength
Needle Types and Characteristics
Cutting Needles
Triangular cross-section
- • Conventional cutting
- • Reverse cutting
- • Use: Skin, tough tissues
Taper Needles
Round, smooth point
- • Minimal tissue trauma
- • Good for soft tissues
- • Use: Internal organs, vessels
Blunt Needles
Rounded, non-sharp tip
- • Reduced needlestick risk
- • Friable tissue protection
- • Use: Liver, kidney closure
Memory Aid: Suture Selection “MATCH”
- Material – Choose appropriate suture material
- Absorption – Consider absorption needs
- Tissue – Match suture to tissue characteristics
- Conditions – Consider patient and wound factors
- Healing – Account for healing timeline
Suturing Techniques & Applications
Proper suturing technique ensures optimal wound healing, minimal scarring, and reduced complications. Understanding various suturing methods and their applications is essential for perioperative nursing care.
Basic Suturing Techniques
Interrupted Sutures
Simple Interrupted
- • Most versatile technique
- • Individual knots for each suture
- • Good for wound edge approximation
- • Easy to adjust tension
Vertical Mattress
- • Excellent eversion
- • Good for skin under tension
- • Reduces dead space
- • May leave suture marks
Horizontal Mattress
- • Strong closure
- • Good for friable tissue
- • Distributes tension
- • Risk of tissue strangulation
Continuous Sutures
Running Simple
- • Fast closure technique
- • Watertight seal
- • Good for bowel anastomosis
- • Risk of purse-string effect
Running Locked
- • Excellent hemostasis
- • Self-securing technique
- • Good for vascular procedures
- • May compromise circulation
Subcuticular
- • Excellent cosmetic results
- • No suture marks
- • Comfortable for patient
- • Requires precise technique
Specialized Suturing Applications
Cardiovascular
- • Double-armed sutures
- • Pledgeted sutures
- • Fine, non-reactive materials
- • Precise tension control
Ophthalmology
- • 9-0 to 11-0 sutures
- • Microsurgical technique
- • Minimal tissue reaction
- • Corneal and scleral sutures
Neurosurgery
- • Dural closure techniques
- • Watertight seal essential
- • Fine, absorbable materials
- • Minimal inflammatory response
Knot Tying Techniques
Two-Hand Tie
- • Traditional method
- • Good for surface sutures
- • Allows tension adjustment
- • Requires adequate space
Instrument Tie
- • Deep cavity suturing
- • Conserves suture material
- • More precise control
- • Requires practice
Knot Security Guidelines:
- • Use appropriate number of throws
- • Alternate throw directions
- • Maintain consistent tension
- • Check knot security
- • Avoid excessive tightening
- • Consider suture material properties
Nursing Implementation: Suture Support
Pre-suturing Preparation:
- • Prepare appropriate suture selection
- • Ensure proper needle holder function
- • Arrange sutures in order of use
- • Check suture package integrity
During Suturing:
- • Cut sutures to appropriate length
- • Provide counter-traction when needed
- • Keep suture line moist
- • Count sutures placed
Specialized Surgical Equipment
Modern surgery relies on sophisticated equipment beyond basic instruments. Understanding specialized equipment operation, safety features, and nursing responsibilities ensures optimal patient care and procedural success.
Energy-Based Devices
Electrosurgical Units (ESU)
Monopolar Electrosurgery
- • Active electrode at surgical site
- • Return electrode (grounding pad)
- • Current travels through patient
- • Higher power, broader effect
Bipolar Electrosurgery
- • Both electrodes at surgical site
- • Current between forcep tips
- • More precise control
- • Safer in some applications
Advanced Energy Systems
Ultrasonic Devices
- • Harmonic scalpel technology
- • Simultaneous cutting and coagulation
- • Minimal thermal damage
- • Reduced smoke production
Advanced Bipolar
- • LigaSure vessel sealing
- • Controlled energy delivery
- • Reliable vessel closure
- • Tissue fusion technology
Surgical Imaging Systems
C-Arm Fluoroscopy
- • Real-time X-ray imaging
- • Orthopedic procedures
- • Vascular interventions
- • Radiation safety protocols
Surgical Microscopes
- • High magnification
- • Neurosurgery, ophthalmology
- • Coaxial illumination
- • Recording capabilities
Endoscopic Systems
- • Minimally invasive surgery
- • HD camera systems
- • Multiple viewing options
- • Integrated recording
Surgical Support Equipment
Operating Room Table Systems
Standard Features:
- • Height adjustment (hydraulic/electric)
- • Trendelenburg/reverse positioning
- • Lateral tilt capabilities
- • Modular accessory system
Specialized Attachments:
- • Orthopedic extensions
- • Neurosurgical headrests
- • Cardiac surgery accessories
- • Bariatric patient supports
Surgical Lighting Systems
LED Surgical Lights:
- • High-intensity illumination
- • Color temperature adjustment
- • Shadow reduction technology
- • Energy efficient operation
Control Features:
- • Sterile handle positioning
- • Intensity adjustment
- • Focus beam control
- • Emergency backup systems
Equipment Safety Protocols
Pre-operative Checks:
- • Verify equipment functionality
- • Check electrical connections
- • Test emergency procedures
- • Confirm backup systems
During Surgery:
- • Monitor equipment performance
- • Maintain sterile interfaces
- • Document any malfunctions
- • Follow manufacturer protocols
Nursing Implementation & Care
Perioperative nurses play a crucial role in surgical instrumentation management. This includes pre-operative preparation, intraoperative support, and post-operative care to ensure patient safety and optimal surgical outcomes.
Pre-operative Responsibilities
Instrument Preparation and Setup
Case Planning:
- • Review surgeon preference cards
- • Verify procedure requirements
- • Check special equipment needs
- • Confirm implant availability
- • Prepare backup instruments
Sterile Setup:
- • Verify sterility indicators
- • Arrange instruments logically
- • Prepare suture materials
- • Test equipment function
- • Document setup completion
Patient Safety Considerations
Positioning Safety:
- • Pressure point protection
- • Proper body alignment
- • Nerve compression prevention
- • Circulation maintenance
Electrical Safety:
- • Grounding pad placement
- • Equipment inspection
- • Power setting verification
- • Emergency procedures
Infection Control:
- • Sterile field maintenance
- • Contamination prevention
- • Proper hand hygiene
- • Aseptic technique
Intraoperative Management
Circulating Nurse Responsibilities
Equipment Management:
- • Monitor equipment function
- • Adjust settings as needed
- • Troubleshoot technical issues
- • Coordinate equipment changes
- • Maintain supply availability
Safety Monitoring:
- • Count instrument accountability
- • Monitor patient positioning
- • Observe for complications
- • Document procedure events
- • Communicate with team
Scrub Nurse Responsibilities
Instrument Management:
- • Anticipate surgeon needs
- • Pass instruments properly
- • Maintain sterile field
- • Keep instruments clean and functional
- • Organize instruments efficiently
Procedure Support:
- • Provide hemostasis assistance
- • Manage suture materials
- • Assist with specimen handling
- • Maintain instrument counts
- • Prepare closure materials
Post-operative Care
Immediate Post-operative Actions
Final Counts:
- • Complete instrument counts
- • Verify sponge counts
- • Check sharp counts
- • Document discrepancies
- • Report to surgeon
Specimen Handling:
- • Label specimens correctly
- • Use appropriate preservatives
- • Complete requisitions
- • Coordinate with pathology
- • Document specimen data
Equipment Care:
- • Clean instruments properly
- • Inspect for damage
- • Prepare for sterilization
- • Document equipment issues
- • Return equipment safely
Quality Improvement Initiatives
Data Collection:
- • Track instrument-related delays
- • Monitor equipment malfunctions
- • Record count discrepancies
- • Document near-miss events
Process Improvement:
- • Develop standardized procedures
- • Implement safety checklists
- • Provide staff education
- • Share best practices
Sterilization & Maintenance
Proper sterilization and maintenance of surgical instruments is fundamental to infection prevention and instrument longevity. Understanding sterilization methods, maintenance procedures, and quality assurance ensures safe, reliable instrumentation.
Sterilization Methods
Steam Sterilization (Autoclave)
Standard Parameters:
- • Temperature: 121°C (250°F) or 134°C (273°F)
- • Pressure: 15-30 psi
- • Time: 15-30 minutes
- • Most reliable and economical
Applications:
- • Metal instruments
- • Heat-resistant materials
- • Wrapped instrument sets
- • Emergency sterilization
Low-Temperature Methods
Ethylene Oxide (ETO):
- • Temperature: 37-63°C
- • Long cycle times (12-24 hours)
- • Heat-sensitive materials
- • Requires aeration period
Hydrogen Peroxide Plasma:
- • Low temperature process
- • Fast cycle times (45-75 minutes)
- • No toxic residuals
- • Limited penetration ability
Instrument Processing Workflow
Central Sterile Supply Department (CSSD) Process
1. Decontamination
- • Point-of-use treatment
- • Manual cleaning
- • Ultrasonic cleaning
- • Washer-disinfector
2. Inspection
- • Visual examination
- • Function testing
- • Damage assessment
- • Repair identification
3. Packaging
- • Appropriate wrapping
- • Sterilization pouches
- • Container systems
- • Indicator placement
4. Sterilization
- • Method selection
- • Cycle monitoring
- • Quality control
- • Documentation
Quality Assurance Programs
Sterilization Monitoring
Physical Monitoring:
- • Temperature gauges
- • Pressure indicators
- • Time recording
- • Cycle printouts
Chemical Indicators:
- • External indicators
- • Internal indicators
- • Integrating indicators
- • Emulating indicators
Biological Indicators:
- • Spore test strips
- • Self-contained indicators
- • Weekly testing minimum
- • Challenge test packs
Preventive Maintenance
Routine Care:
- • Daily cleaning and inspection
- • Lubrication of moving parts
- • Calibration checks
- • Performance documentation
Professional Service:
- • Scheduled maintenance visits
- • Component replacement
- • Performance verification
- • Compliance certification
Memory Aid: Sterilization “STEPS”
- Sort and decontaminate instruments properly
- Test all functions before sterilization
- Ensure proper packaging and indicators
- Process according to manufacturer guidelines
- Store sterile items appropriately
Safety Considerations
Surgical instrument safety encompasses multiple domains including infection control, occupational safety, patient protection, and emergency preparedness. Comprehensive safety protocols protect all surgical team members and patients.
Occupational Safety
Sharps Safety
Prevention Strategies:
- • Use hands-free passing techniques
- • Implement neutral zone concept
- • Utilize safety-engineered devices
- • Never recap needles
- • Immediate disposal in sharps containers
Exposure Response:
- • Immediate wound care
- • Report incident promptly
- • Seek medical evaluation
- • Follow post-exposure protocols
- • Complete documentation
Chemical Safety
Common Hazards:
- • Sterilization chemicals (ETO, formaldehyde)
- • Cleaning agents and disinfectants
- • Surgical smoke and plume
- • Anesthetic gases
- • Latex allergens
Protection Measures:
- • Appropriate PPE selection
- • Adequate ventilation systems
- • Proper handling procedures
- • Regular exposure monitoring
- • Emergency response plans
Patient Safety Protocols
Surgical Count Procedures
Initial Count:
- • Before procedure begins
- • Circulator and scrub nurse
- • Audible counting required
- • Document all items
- • Verify packaging counts
Closing Counts:
- • Before cavity closure
- • Before skin closure
- • Two-person verification
- • Document results
- • Inform surgeon of results
Discrepancy Protocol:
- • Immediate notification
- • Search procedures
- • Radiographic examination
- • Documentation requirements
- • Incident reporting
Equipment-Related Safety
Electrical Safety:
- • Regular equipment inspection
- • Proper grounding verification
- • Isolation transformer use
- • Emergency power procedures
- • Staff competency validation
Fire Safety:
- • Fire triangle awareness
- • Oxygen concentration monitoring
- • Ignition source control
- • Emergency extinguishing methods
- • Evacuation procedures
Emergency Preparedness
Crisis Management Protocols
Equipment Malfunction:
- • Immediate alternative availability
- • Clear communication protocols
- • Technical support contacts
- • Backup system activation
- • Incident documentation
Medical Emergency:
- • Code team notification
- • Emergency cart availability
- • Clear access pathways
- • Communication with family
- • Post-event debriefing
Never Event Prevention
Retained Foreign Objects:
- • Standardized counting procedures
- • Universal radiological screening
- • Technology-assisted counting
- • Clear documentation protocols
Wrong Site Surgery:
- • Universal Protocol compliance
- • Site marking verification
- • Time-out procedures
- • Team communication
Equipment for Common Surgical Procedures
Different surgical specialties require specific instrument sets and equipment configurations. Understanding these requirements enables nurses to anticipate needs, prepare appropriately, and support efficient surgical workflow.
General Surgery Procedures
Laparoscopic Surgery
Essential Equipment:
- • Laparoscope (5mm, 10mm)
- • CO2 insufflation system
- • Trocars and cannulas
- • Graspers, scissors, clip appliers
- • Energy devices (monopolar, bipolar)
- • Specimen retrieval bags
Nursing Considerations:
- • Monitor insufflation pressure
- • Maintain equipment sterility
- • Coordinate camera and lighting
- • Prepare for conversion to open
Open Abdominal Surgery
Basic Instrument Set:
- • Scalpels (#10, #11, #15 blades)
- • Mayo and Metzenbaum scissors
- • Tissue and dressing forceps
- • Hemostatic clamps (Kelly, Rochester)
- • Retractors (Richardson, Deaver)
- • Needle holders and sutures
Specialized Additions:
- • Bowel clamps for GI procedures
- • Vascular clamps for major vessels
- • Self-retaining retractors
- • Stapling devices as needed
Orthopedic Surgery
Fracture Repair Equipment
Power Tools:
- • Power drills and bits
- • Oscillating saws
- • Reamers and drivers
- • Air-powered systems
- • Battery backup units
Fixation Hardware:
- • Plates and screws
- • Intramedullary nails
- • External fixation devices
- • Bone grafts and substitutes
- • Cement mixing systems
Specialized Instruments:
- • Bone clamps and holders
- • Reduction forceps
- • Osteotomes and chisels
- • Curettes and gouges
- • Measurement guides
Joint Replacement Surgery
Hip Replacement:
- • Acetabular reamers and trials
- • Femoral broaches and rasps
- • Component insertion tools
- • Cement delivery systems
- • Specialty retractor sets
Knee Replacement:
- • Cutting guides and jigs
- • Oscillating saw blades
- • Trial components
- • Alignment guides
- • Pulsatile lavage systems
Cardiovascular Surgery
Cardiac Procedure Equipment
Bypass Surgery:
- • Cardiopulmonary bypass machine
- • Aortic and venous cannulas
- • Cardioplegia delivery system
- • Vascular clamps and occluders
- • Microscissors and forceps
- • Coronary probes and dilators
Valve Surgery:
- • Valve prostheses (mechanical, tissue)
- • Valve holders and handlers
- • Pledgeted sutures
- • Valve sizers and measures
- • Annuloplasty rings
- • Transesophageal echo probe
Neurosurgery
Cranial Surgery Equipment
Craniotomy Set:
- • Craniotome and perforators
- • Bone rongeurs
- • Dural elevators
- • Self-retaining retractors
- • Microsurgical instruments
Microscope System:
- • Operating microscope
- • Video recording system
- • Coaxial illumination
- • Multiple eyepiece options
- • Surgeon preference settings
Monitoring Equipment:
- • Neuromonitoring systems
- • ICP monitoring devices
- • Stereotactic navigation
- • Ultrasonic aspirators
- • Endoscopic systems
Procedure-Specific Nursing Checklist
Pre-operative Verification:
- • Review surgeon preference card
- • Verify special equipment availability
- • Check implant expiration dates
- • Confirm backup equipment readiness
Intraoperative Management:
- • Monitor equipment function continuously
- • Maintain sterile equipment interfaces
- • Document equipment serial numbers
- • Coordinate with technical support
Key Takeaways for Nursing Practice
Essential Competencies:
- • Master instrument identification and function
- • Understand suture selection principles
- • Apply safety protocols consistently
- • Maintain sterile technique integrity
- • Support efficient surgical workflow
Professional Development:
- • Pursue specialty certifications
- • Stay current with technology advances
- • Participate in quality improvement
- • Mentor new perioperative nurses
- • Advocate for patient safety
Created for nursing education and professional development
Always consult current literature, facility policies, and manufacturer guidelines for the most up-to-date information